This post is not about where to begin when looking for your bridal belt, it as about how to finish it off.
Allow me to explain...
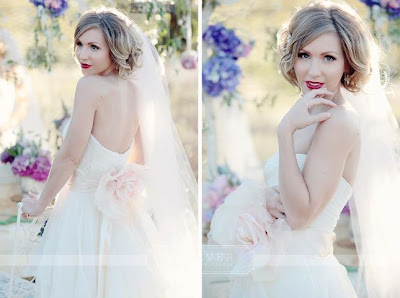
With all of the options available, many times it is easy to get caught up in the sparkles and dazzle of your bridal image in the mirror, but you must remember that your guests will be viewing you from behind...so make it the best behind you can.
Here's how:
First determine if the addition of a bridal belt will be worn for both the ceremony and reception. (Many brides choose to add their sash as the reception begins to signify a more festive, party look.) Next, take a gander at your tush. Would you like to have a pretty bow draping down the back? Do you want a tailored, belting synch at the waist? Are there buttons that you want to make sure are not covered up? Does your gown have a lace up corset back?
Sounds like a lot to digest, but it is really a personal preference, and easily customized.
Here are some of my favorite options:
This is the easiest and most common of closures...the bow. Good enough for these Lazaro lovelies on the runway...good enough for me!! :) My only hint for making the prettiest placement possible is to ensure that the ribbons hanging down from the bow are at similar lengths. Other than that, pretty much the "loop, swoop and pull" technique works just fine.


This classic gown is from Paloma Blanca , and instead of taking the bow to the back, they have made the front brooched and bejeweled bow their signature. This look will work with any gown and satin ribbon, just make sure that the length is sufficient. The ribbon will be placed flat in the front of the, at an equal length, looped around the back as tight as possible, brought the the front and finished off with a side bow. Once the bow is complete, a brooch can be placed in the middle to add a touch of sparkle.

These two next beauties are from Jim Hjelm, and are a great example of a fully beaded belt. The backing is translucent, so all you are adding to your waist is sparkle, no color. Typically, these belts are finished off with a double, large hook and eye closure, so your seamstress will need to cut it to your exact measurements. These belts are often sewn directly on to gown to ensure perfect placement. One fair warning, stones can often snag lace and organza fabrics very easily, so make sure that someone else helps you put it on and remove it.


This is our very own "Dylan" belt from our exclusive Grayson Elise brand. This new season was filled with front closure belts such as this precious piece. Once again, it is an exact size, so there should be alterations after it is ordered. This particular belt can be worn again and again. It looks adorable on a LBD, and even as a headband. Too cute!

We love WTOO's "Camden"gown. This lovely lace gown has an already prepared obi tie in the back of the gown that adds instant glam to this already chic dress. This can be recreated with a more tailored and stiff fabric such as silk taffeta to ensure that the lux look of the layers in the obi take shape. This technique can definitely take a couple of tries, but the end result is so worth it. The best way that I know how to explain it is to begin the process as if you are making an exaggerated bow, but only pulling one side through the loop. From that point you can fold it over and let it lay flat like "Camden", or raise it up and add a brooch to keep it in place.

No comments:
Post a Comment